
HOW TO RE-PURPOSE BEDSIDE TABLES!!!
- Mar 8, 2018
- 3 min read
Updated: Sep 13, 2018


Once upon a time, in the parish of St. Philip, were two bedside tables who were once hip and trendy but recently, felt as though they well, as we like to say “lost their shine”. They wanted to get some of that glow back and become more modern and contemporary. They wanted a new lease on life, they wanted a new colour, new accessories. To make a long story short, they wanted to bring sexy back! (Better known in the design world as upcycling).
I said that I would help them along on this journey, so I needed to know a few things before I began to assist. I will admit that although designing is my thing, this is not the case for being handy! Nonetheless, I took on the challenge, determined to get a good outcome.
HOW TO RE-PURPOSE BEDSIDE TABLES!!!
My Plan

I knew I needed to devise a plan! I needed the right tools, colour and accessories for this transformation. So before I bought anything, I decided to begin at the end, meaning I knew exactly how I wanted my end result to be. All I needed to do was to make it happen. I knew the tables had to be prepped before they were painted, I wanted a colour change and I wanted a new drawer handle. So I made a checklist.
Sandpaper - check
Colour - check
Screwdriver- check
Hand broom- check
Wood filler - check
Newspaper/plastic bags- check
Face mask/ scarf- check
Drill - check
HOW TO RE-PURPOSE BEDSIDE TABLES!!!
Time to get prepped
I already had some of the things on my checklist at home and the other things I had to buy.
I began by using the screwdriver to remove the old handle and I drilled two new holes (the new handle required two holes) and I pulled out the drawer to make it easier to paint.
Sanding

I wanted to remove the old gloss that was on the tables and because they are made out of wood, I had to sand them down (this was no fun) but necessary.
The grade of sandpaper I chose was an 80 and a 120. The 80 was rough , to ensure I removed all of the previous gloss and old wood and then I went over that with the 120 which is much finer and makes the wood smooth.
I then looked for any holes or dents, filled them with wood filler, left it to dry for about half an hour and then sanded over those areas.
Cleaning
I needed to get rid of all of the bits of sanded wood so that it would not ruin the paint, so I used a hand broom and brushed off all of the wood and dust particles and wiped off the tables with some soap and water. Now, it was showtime!!
HOW TO RE-PURPOSE BEDSIDE TABLES!!!
Painting and accessories

I bought a metallic spray paint and I was very excited to try it out myself. I selected the colour based on where these tables were going. I neglected to say that these tables were going to be in my own bedroom. My room colour is a light lavender so I knew I needed a colour that would go well with this. I chose a metallic bronze and the handle I selected has a contemporary shape.

I covered my nose and mouth with a face mask (because I really wanted to get into character lol) however, a scarf would do, to protect myself from the paint fumes and followed the instructions on the can which were to hold the can upright 10-16 inches away from the surface and spray while moving the can back and forth, (this was simpler than I thought).
All I had to do now was to put the on another coat and place the new handles on by screwing it in place and I was done!

HOW TO RE-PURPOSE BEDSIDE TABLES!!!
Ta da!!
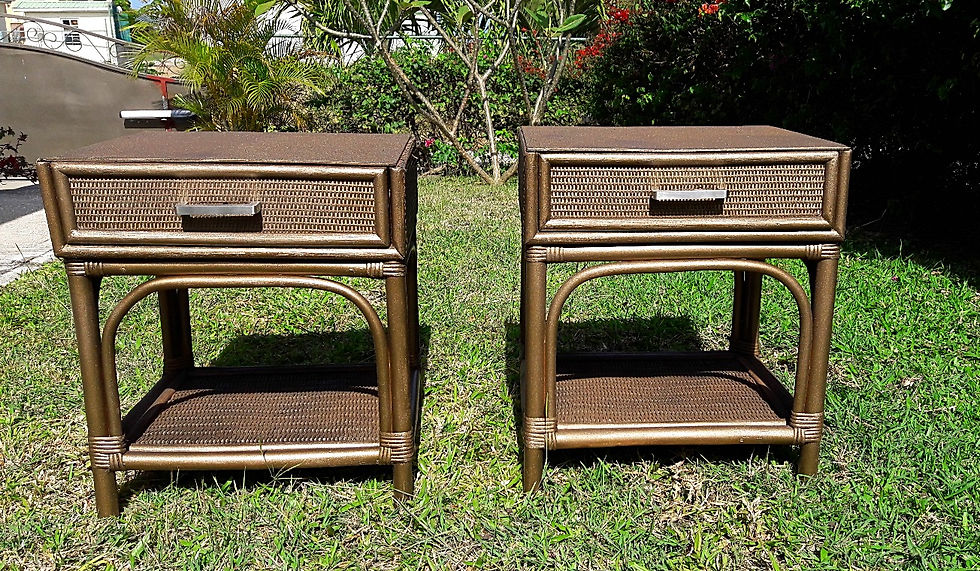
Now that the transformation is over, it was time to show these two beauties their new living space. I love how they turned out and they fit right into the space. Now I have two upcycled night stands that look brand new!
It's important to remember that we should try to upcycle most things in life, this does not only apply to furniture. We should all strive to keep upcycling ourselves.
On that note, I wish all the beautiful women out there Happy International Women's Day! #keepstriving #timesup #womensday2018


Comments